
Purple Dead Nettle (Lamium purpureum) is one of those plants that often gets dismissed as just another pesky weed. But in truth, this little wildflower is packed with healing potential — and it’s likely growing for free right in your backyard, garden, or along country paths. With its soft, purple-tinged leaves and delicate pink blooms, this mint family member offers a soothing, anti-inflammatory, and antimicrobial boost for your skin. One of the easiest and most effective ways to put its goodness to work? Whipping up a homemade herbal cream.
Let’s walk through how to make Purple Dead Nettle cream at home, and why you’ll want to keep a jar close at hand all year long.
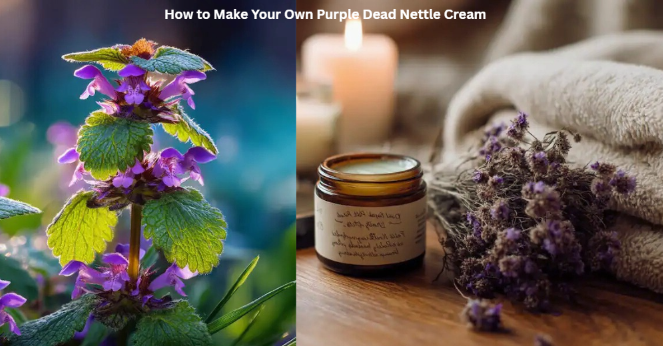
First, What Exactly Is Purple Dead Nettle?
Despite what its name suggests, Purple Dead Nettle isn’t related to the stinging nettle — and it definitely won’t leave you with any painful welts. It’s called “dead” because while its leaves look like the notorious stinging nettle, they lack the sharp hairs that cause irritation.
This plant thrives in spring and early summer and is loved for its natural benefits, including:
- Antibacterial power to help fight germs
- Support for wound healing
- Anti-inflammatory properties to calm the skin
- Packed with antioxidants, plus skin-loving vitamins A, C, and a healthy dose of flavonoids.
What You’ll Need to Make Purple Dead Nettle Cream
- 1 cup fresh Purple Dead Nettle leaves and flowers (rinsed and patted dry)
- ½ cup olive oil (or coconut oil for a thicker, balm-like texture)
- 1 tablespoon beeswax (this helps firm up the cream)
- Optional: A few drops of lavender essential oil for extra scent and calming effects
- A small glass jar for storing your finished cream
How to Make It — Step by Step
- Chop the Purple Dead Nettle
Finely chop the fresh leaves and flowers to help release their healing compounds. - Infuse the Oil
Add the chopped plant to a small saucepan or double boiler along with your olive or coconut oil.
Warm the mixture on low heat for 30 to 60 minutes, stirring now and then.
Be sure to avoid overheating — you want a gentle infusion, not a fried herb mess! - Strain the Oil
Once infused, strain the mixture using cheesecloth or a fine-mesh strainer to remove any plant bits.
Transfer the clear oil to a clean bowl. - Add the Beeswax
Pour the strained oil back into your pan, toss in the beeswax, and gently heat it until the wax melts completely.
Stir thoroughly, then remove from heat. - Add Essential Oils (Optional)
If you’d like, add a few drops of lavender or tea tree essential oil for extra skin-soothing benefits and aroma.
Give it a final stir to blend. - Jar and Store
Pour the warm mixture into your glass jar, let it cool and harden at room temperature.
Once solid, store your cream in a cool, dry place — it’ll stay fresh for up to six months.
Why Use Purple Dead Nettle Cream?
This simple homemade cream is wonderfully versatile and a great addition to any natural skincare or first aid kit:
- Soothes eczema, dry patches, minor burns, and skin irritations
- Cleanses and protects cuts and scrapes while supporting healing
- Eases sore muscles, joint aches, and insect bites
- Gentle enough for most skin types, including kids and seniors
- Loaded with antioxidants that nourish and protect your skin
A Few Safety Tips
- Always do a quick patch test before slathering it on, just to be sure your skin agrees.
- Only use plants harvested from clean, chemical-free areas — far from roadsides or sprayed gardens.
- If you’re treating a serious wound or skin condition, always seek medical advice first.
Nature’s Little Gift in a Jar
Purple Dead Nettle cream is a natural, cost-effective way to care for your skin and tackle everyday cuts, scrapes, dryness, and soreness. It’s easy to make, and once you’ve tried it, you’ll wonder how you ever did without it. So the next time you spot this humble plant growing nearby, don’t rush to pull it up — it just might become your skin’s new best friend.
