
Growing your own peanuts might sound like a challenge, but it’s actually a fun and satisfying gardening project—even for beginners. These delicious legumes are not only packed with nutrients but also intriguing to grow. Whether you’re planting in your backyard or a container on the patio, this guide walks you through each step of the peanut-growing process—from seed to harvest.
🧺 What You’ll Need:
- Raw, unprocessed peanut seeds (with shells)
- A garden bed or large container
- Organic compost
- Garden trowel
- Organic fertilizer
- Garden gloves
- Watering can or hose
- Mulch (such as straw or leaves)
- Garden markers
- Natural pest control (if needed)
🌱 Step 1: Choose the Right Peanut Seeds
Start with raw, untreated peanuts—the kind still in their shells and not roasted, salted, or processed. You can often find them at health food stores or purchase certified peanut seeds from garden centers or online. Make sure they’re whole and fresh, not cracked or dried out.
💦 Step 2: Soak Before Planting
To jumpstart germination, soak the peanut seeds in water for about 24 hours. This softens the outer shell, making it easier for sprouts to emerge.
🏡 Step 3: Prepare Your Soil and Plant
- Location: Choose a sunny spot—peanuts need full sun for most of the day.
- Soil: Peanuts thrive in loose, sandy, well-draining soil rich in organic matter.
- Spacing: Plant the seeds 1 to 1.5 inches deep and about 4 inches apart in rows spaced roughly 2 feet apart.
- Soil Boost: Before planting, work compost and a bit of organic fertilizer into the soil to encourage strong growth.
💧 Step 4: Water Regularly
Keep the soil consistently moist, especially during the flowering and pod formation stages. Peanuts generally need about 1 to 1.5 inches of water per week. Avoid overwatering, as soggy soil can lead to rot.
🌿 Step 5: Mulch for Protection
Add a layer of mulch around your plants to help retain soil moisture, reduce weeds, and protect developing pods as they begin to push into the soil.
🌸 Step 6: Fertilize and Prune
- Feeding: Use a balanced organic fertilizer during planting and again once the plants begin to flower.
- Pruning: If your plants become overly bushy, trim back some of the extra branches to improve airflow and focus the plant’s energy on pod production.
⏳ Step 7: Time the Harvest
Peanuts typically take about 4 to 5 months (120–150 days) to fully mature. When the leaves start turning yellow, it’s time to check your crop.
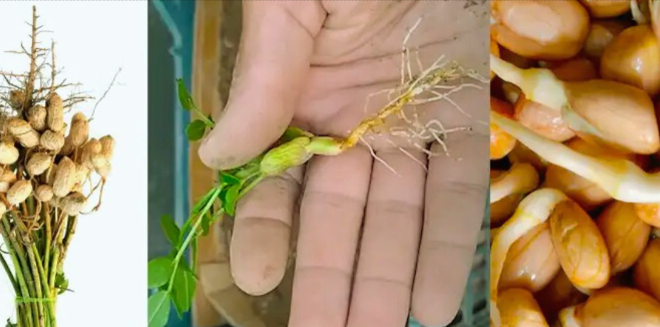
🥜 Step 8: Harvest with Care
- Gently loosen the soil around the base of a plant.
- Pull up the entire plant and shake off the excess soil.
- The peanuts will be attached to the roots—pluck them off and lay them out to dry in the sun for a day or two.
🌬️ Step 9: Cure and Store
- After drying, let the peanuts air cure for 2 to 3 weeks in a well-ventilated area protected from rain.
- Once fully cured, store them in a cool, dry place using a mesh bag or a shallow basket to allow air circulation.
🏡 Homegrown Peanuts: A Delicious Reward
From soaking the seeds to pulling up your first homegrown peanuts, this journey is both fun and fulfilling. With a bit of patience and care, you’ll soon be enjoying your very own crunchy, fresh peanuts—grown right at home. Whether you roast them, boil them, or snack on them raw, there’s nothing quite like a harvest you nurtured yourself.
Happy peanut planting!
